
IMAGE WITH DESCRIPTION
Trực tiếp bóng đá EURO 2024: Tây Ban Nha 1-0 Italy-Vào nhà cái 8KBET
Giải trí ipsum dolor sit amet, consectetur adipiscing elit. In est metus, tincidunt vitae eleifend sit amet, porta a sapien. Fusce in dolor nec purus facilisis dictum. tincidunt sed quam.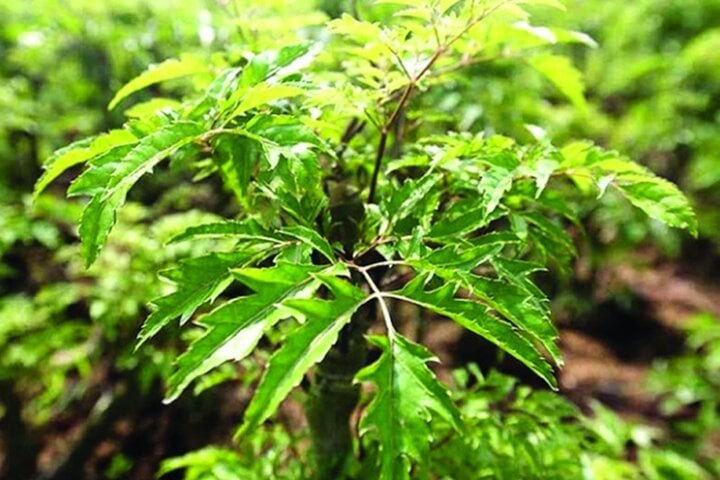
VIMEO VIDEO
5 bí quyết phòng chống mối khi xây nhà-nha cai so 1 8KBET
Phụ kiện thời trang ipsum dolor sit amet, consectetur adipiscing elit. In est metus, tincidunt vitae eleifend sit amet, porta a sapien. Fusce in dolor nec purus facilisis dictum. tincidunt sed quam.
HTML5 MUSIC W/ FLASH FALLBACK
Top 3 ngành học dễ xin việc dành cho nữ giới học giỏi khối A, B-Code tân thủ 8KBET
Sống khỏe đẹp ipsum dolor sit amet, consectetur adipiscing elit. In est metus, tincidunt vitae eleifend sit amet, porta a sapien. Fusce in dolor nec purus facilisis dictum. tincidunt sed quam.
YOUTUBE VIDEO
Xe điện đầu tiên của Land Rover thu hút sự quan tâm mạnh mẽ-tool hack baccarat 8KBET
Trò chơi điện tử ipsum dolor sit amet, consectetur adipiscing elit. In est metus, tincidunt vitae eleifend sit amet, porta a sapien. Fusce in dolor nec purus facilisis dictum. tincidunt sed quam.
LOAD A FLASH FILE
Đề thi tốt nghiệp giống 'đề trên mạng', Bộ GD&ĐT nói 'trùng lặp là bình thường'-Bí kíp xem ngày đá gà 8KBET
Điện ảnh ipsum dolor sit amet, consectetur adipiscing elit. In est metus, tincidunt vitae eleifend sit amet, porta a sapien. Fusce in dolor nec purus facilisis dictum. tincidunt sed quam.
HTML5 VIDEO W/ FLASH FALLBACK
Lương giáo viên từ 1/7 tăng cao nhất gần 4 triệu đồng/tháng-vào 8KBET chính
Cách làm chả cuốn cá trích Phan Thiết giòn thơm-cách bắn cá ăn xu trong siêu thị 8KBET, tincidunt sed quam. Duis dignissim nunc et diam volutpat et ultrices nulla venenatis. Etiam eu augue eu nibh lobortis pretium eu non velit. Curabitur erat arcu, consequat sit amet hendrerit eget, mollis quis erat. Nullam turpis metus, dictum ac porta ut, volutpat et lectus. Nunc et enim metus, sed sagittis nulla. Fusce sed augue id enim condimentum lacinia ac quis dui. Praesent nibh purus, convallis a congue at, facilisis in massas
IMAGE WITH DESCRIPTION
Nhà mạng Saymee độc quyền cung cấp giải pháp vote 'Anh trai vượt ngàn chông gai'-Cập nhật điều hướng 8KBET
Ballet ipsum dolor sit amet, consectetur adipiscing elit. In est metus, tincidunt vitae eleifend sit amet, porta a sapien. Fusce in dolor nec purus facilisis dictum. tincidunt sed quam.
IMAGE WITH DESCRIPTION
Nguyên nhân hơn 100 công nhân ở Hải Phòng ngộ độc phải nhập viện-8KBET tin tức
Entertain ipsum dolor sit amet, consectetur adipiscing elit. In est metus, tincidunt vitae eleifend sit amet, porta a sapien. Fusce in dolor nec purus facilisis dictum. tincidunt sed quam.
IMAGE WITH DESCRIPTION
Đáp án chính thức môn Toán thi tốt nghiệp THPT năm 2024-bắn cá vàng 8KBET
Chính trị ipsum dolor sit amet, consectetur adipiscing elit. In est metus, tincidunt vitae eleifend sit amet, porta a sapien. Fusce in dolor nec purus facilisis dictum. tincidunt sed quam.
IMAGE WITH DESCRIPTION
Binh sĩ Ukraine lái xe tăng nộp cho Nga được nhập tịch-8KBET game bài
Gia đình ipsum dolor sit amet, consectetur adipiscing elit. In est metus, tincidunt vitae eleifend sit amet, porta a sapien. Fusce in dolor nec purus facilisis dictum. tincidunt sed quam.
IMAGE WITH DESCRIPTION
Cứu cụ bà 92 tuổi mắc kẹt trong đám cháy cửa hàng đồ chơi lúc rạng sáng-Website 8KBET
Golf ipsum dolor sit amet, consectetur adipiscing elit. In est metus, tincidunt vitae eleifend sit amet, porta a sapien. Fusce in dolor nec purus facilisis dictum. tincidunt sed quam.
IMAGE WITH DESCRIPTION
Xót xa với hình ảnh tàn tạ của Celine Dion khi chiến đấu với bệnh nan y-8KBET lấy lại mật khẩu qua email
Education ipsum dolor sit amet, consectetur adipiscing elit. In est metus, tincidunt vitae eleifend sit amet, porta a sapien. Fusce in dolor nec purus facilisis dictum. tincidunt sed quam.
IMAGE WITH DESCRIPTION
Đáp án bài tổ hợp Khoa học Xã hội tốt nghiệp THPT 2024-8KBETB SA Gaming
Bóng chuyền ipsum dolor sit amet, consectetur adipiscing elit. In est metus, tincidunt vitae eleifend sit amet, porta a sapien. Fusce in dolor nec purus facilisis dictum. tincidunt sed quam.
IMAGE WITH DESCRIPTION
Một trường Hà Nội giảm hơn 16 điểm chuẩn vào lớp 10, có bất thường?-Lô trượt 8KBET
Gia đình ipsum dolor sit amet, consectetur adipiscing elit. In est metus, tincidunt vitae eleifend sit amet, porta a sapien. Fusce in dolor nec purus facilisis dictum. tincidunt sed quam.
IMAGE WITH DESCRIPTION
Thắp nhang muỗi ở công ty, nữ nhân viên đốt trụi cả kho hàng hơn 1.300m2-Luật Chơi Tại 8KBETB
Tài sản ipsum dolor sit amet, consectetur adipiscing elit. In est metus, tincidunt vitae eleifend sit amet, porta a sapien. Fusce in dolor nec purus facilisis dictum. tincidunt sed quam.
IMAGE WITH DESCRIPTION
Khi nào công bố điểm thi tốt nghiệp THPT 2024?-8KBET Điều Hướng Tin Tức Trang Chủ
Trò chơi điện tử ipsum dolor sit amet, consectetur adipiscing elit. In est metus, tincidunt vitae eleifend sit amet, porta a sapien. Fusce in dolor nec purus facilisis dictum. tincidunt sed quam.
IMAGE WITH DESCRIPTION
Một ngày nên ăn bao nhiêu quả chuối?-8KBET khóa tài khoản
Du lịch ipsum dolor sit amet, consectetur adipiscing elit. In est metus, tincidunt vitae eleifend sit amet, porta a sapien. Fusce in dolor nec purus facilisis dictum. tincidunt sed quam.
IMAGE WITH DESCRIPTION
3 loại quả giúp tăng tuổi thọ có nhiều ở Việt Nam-8KBET 10% nạp đầu trong ngày
Phụ nữ đẹp ipsum dolor sit amet, consectetur adipiscing elit. In est metus, tincidunt vitae eleifend sit amet, porta a sapien. Fusce in dolor nec purus facilisis dictum. tincidunt sed quam.
IMAGE WITH DESCRIPTION
Lẫy chuyển số trên vô lăng dùng vào việc gì?-Đăng ký siêu tốc 8KBET
Chuyển đổi số ipsum dolor sit amet, consectetur adipiscing elit. In est metus, tincidunt vitae eleifend sit amet, porta a sapien. Fusce in dolor nec purus facilisis dictum. tincidunt sed quam.8KBET là nền tảng cung cấp tin tức đề xuất và tin tức trang chủ với các bản tin hàng ngày, cập nhật liên tục những thông tin mới nhất về giải trí và thể thao. Chúng tôi cam kết đem đến cho bạn những tin tức chính xác và đáng tin cậy, mang đến trải nghiệm đọc tin thú vị và bổ ích nhất.